 |
| Photograph 1 - a high dynamic range scene |
I exposed the scene so that with the highlight area (the white disc reflector) there was only minimal highlight clipping of that object. This of course meant the rest of the scene was rendered as very dark by the camera - because the scene had so much dynamic range. However, I tried not to worry about this as I would later try to 'open up' the shadows. The exposure setttings for the scene were: f6.3, 1/160 and ISO 100.
 |
| Figure 1 - an annotation of the features of the high dynamic range scene |
My recording for the white disc reflector was: f6.3, 1/500 and ISO 100. My recording for the tree was: f6.3, 1/15 and ISO 100 and my recording for the dummy was: f6.3, 1/13 and ISO 100.
I then set about calculating the range in f-stops of the brightest part of the photo (the disc reflector) and the darkest (the dummy). I admittedly found it quite hard to comprehend the relationships between (full stop) f-stops and shutter speeds. However, after some research I understood quite clearly their relationship; namely stops and their effect on exposure. What I gathered was that in order for an exposure to gather twice the light, either the f-stop had to be opened by one full stop or the shutter speed halved. Conversely, in order for the exposure to be half the brightness, either the f-stop had to closed down by one full stop or the shutter speed doubled.
 |
| Figure 2 - a 100% crop of the highlight area (the disc reflector) and also the pixel value sampler |
 |
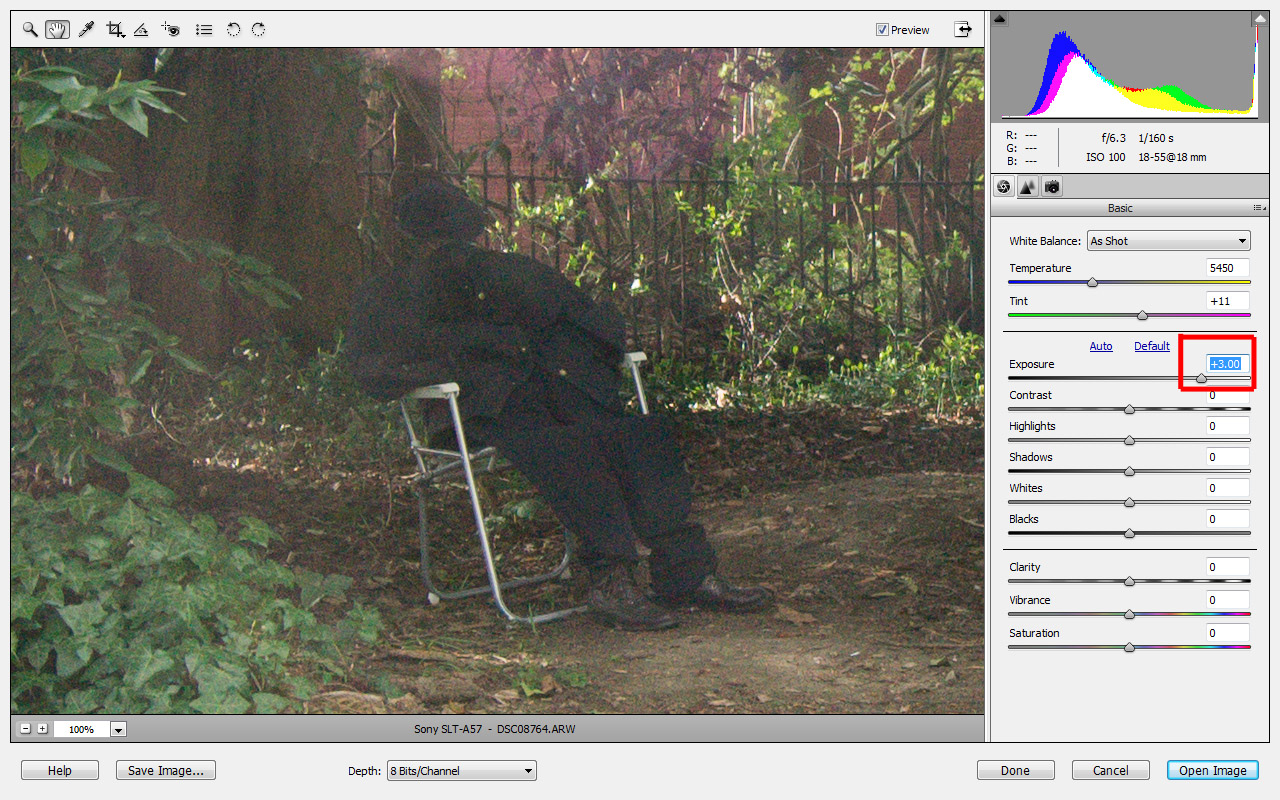
| Photograph 2 - the scene brightened by three stops |
I then set about calculating the extra difference in light between the dummy and the disc reflector. Because the variable in the exposure triangle for my dynamic range test image was the shutter speed, I calculated the difference in stops between the disc reflector and the (unbrightened) dummy from the shutter speeds for each I had recorded earlier. There were 5 full stops (1/500, 1/250, 1/125, 1/60, 1/30, 1/15) difference in brightness between the two.
 |
| Figure 3 - a 100% crop of the shadow area (dummy) with a careful compromise between detail and noise |
I then added this value of 5 stops to the 3 stops gathered from brightening the dummy and converted this into the requested f-stop values. This gave me a range of 8 stops or the equivalent of f2 to f22 in f-stops. Measuring my camera's dynamic range in a practical way like this made me even more aware of how powerful and useful it was to have a camera that could 'open up' shadows like in the scene I set up, while still maintaining an acceptable level of noise.
No comments:
Post a Comment