After receiving feedback from my tutor concerning my fifth assignment for Digital Photographic Practice, I felt it would make the project more complete if I was to address some points my tutor made.
Firstly, I decided (after much debate) to make the pictures-within-the-pictures colour, while the 'main' photograph was in black and white for the fifth assignment. I did this for a reason that I thought made semantical sense and wasn't just an excuse to show off my post-processing skills (even though this was part of the criteria for the assignment brief). The reason was because if a person was daydreaming, the thing they were daydreaming of while at work would probably be more colourful in their mind than there immediate surroundings (represented in black and white).
While I agree with my tutor that it wasn't a very subtle solution to drawing the viewer towards the picture-within-the-picture, I felt the picture-within-the-picture made the shots stand apart and made the viewer question why the picture-within-the-picture existed in the 'main' photograph.
Another comment my tutor gave was asking whether 'my subjects' were personal to me. I had quite strictly adhered to calling them all 'my subjects' in each post! The only reason I hadn't called them by their real names/divulged any extra information about them was to keep them private. Also, I suppose because it was a 'personal project', me protecting their anonymity was in keeping with the project. However, I agree it would make the final photographs more comprehensive if I was to talk more about each subject.
I would say they were indeed personal to me; all consisting of immediate family or close friends. I hadn't really thought about exploring the concept of my relationship with each 'subject' but I could see it as an interesting aspect of any portrait, which might make it more intimate.
Lastly, I felt one idea my tutor had about how to present the work was interesting and similar to something I had actually thought of myself: namely presenting the picture-within-the-picture beside the 'main' photograph. I would have the picture-within-the-picture printed smaller but placed next to the 'main' photograph (as well as (still) being 'inside' the 'main' photograph).
Therefore, I would say it is important to consider how I intend to present the project as a whole to back up what I would consider a strong idea and set of images.
Tuesday, 3 June 2014
Sunday, 20 April 2014
Reflections After Assignment 5 for DPP - Personal project
My reflections after the fifth, final assignment for Digital Photographic Practice were mostly positive. I felt, valuably I came away with much technical and conceptual ideas for my photography, which I could implement in future projects.
For me my technical skills were fine in terms of exposing correctly and my post-processing made the images I produced stronger. However, sometimes I felt images could be sharper or the depth-of-field was too shallow because I wasn't able to use a tripod in many of the situations. Visually though, I thought I exercised good compositional skills and paid attention to smaller details like facial expression, which made a big difference in my opinion.
Overall, I felt the content of my work backed up the strength of my ideas quite well and I managed to incorporate what I'd learnt through Digital Photographic Practice nicely. Also I got across these ideas within the writing in my blog well so it was transparent to the reader what I was trying to do with each photograph/exercise.
Creativity was a major strength in my fifth assignment in my opinion. I developed an idea and carried out the idea quite accurately to my original intentions; adapting certain parts until I was happy with the outcome. I thought from my various influences and consequential ideas I developed quite an uncommon style of photograph for the fifth assignment.
My influences were a bit more limited than I would have liked but almost every one proved to be useful. I thought I communicated well in my blog how the influences affected my concepts. I tried to be clear about the various ideas I was juggling with for the assignment and how they developed.
My Summary of How This Fifth Assignment - Daydreaming While at Work Went
I was on the whole very pleased with the final body of work. I thought the choice of theme was good because it offered an interesting viewpoint and was quite simple to plan for since I was fairly sure each person I would photograph had something they would be daydreaming of ideally.
One area I adapted significantly compared to with my original brief was the use of black and white. I did indeed convert most of the 'main' photographs into black and white but crucially kept the 'daydream' photographs within the photographs in colour. I realise this was quite a bold step to make, with the risk of the photographs becoming a bit 'gimmicky' but I felt it made semantic sense and fitted in well with the rhetoric I was trying to argue. I did experiment with fully black and white but decided against it after consideration.
I was pleased with the consistent theme the photographs possessed together and, for the most part, the photographs-within-the-photographs served their purpose in my opinion; enabling the viewer to recognise the connection between the subject's work and what they'd be daydreaming about. I liked the fact the project was personal too because it allowed me to get some interesting expressions in both the initial photographs-within-photographs and the final 'main' photographs as I knew each person well.
I was very pleased with the amount of creativity I was able to incorporate, both in terms of the main concept and how a lot of the photographs within photographs didn't look too out of place because they were placed imaginatively over flat surfaces in the 'main' scene or at least placed strategically well.
I didn't have any qualms ethically about making most of each final image black and white and then painting colour back into the picture within the picture as it made a clear theme evident, was creative without being too 'gimmicky' in my opinion and was obvious to the viewer that it was intentional.
There were however, some areas I wasn't wholly satisfied with. I was not so satisfied with the quality of some of the final images technically. This was because while using a tripod would have been ideal, it wasn't possible in a lot of the work scenes. Instead I used a high ISO value to compensate for most camera shake. This reduced the quality in some photographs. However, I felt the composition was strong in the photographs, if a little similar in some cases.
Finally I was happy with my workflow, especially seeing as I could use the same repeating process for the whole set of photographs (apart form Photograph 10).
Workflow for Assignment 5 - Daydreaming While at Work
My workflow for the fifth assignment: Daydreaming While at Work, consisted of the following steps:
- Once the subjects had agreed to participating in the project, to arrange and take a shot of the person doing something they'd ideally be doing.
- Print this shot (which would serve as the photograph within the final photograph) at a fairly large size - A3.
- Place the photograph within the photograph in the work-environment scene - over another flat surface if possible.
- Arrange the composition and any additional lighting or tripod placement and ask the subject to think of what they would be daydreaming of.
- Take the final photograph amidst quite a few shots (which I could choose from later) and check them on the camera LCD screen for focus/exposure.
- Open the RAW files on the computer and evaluate which photograph worked 'best' in representing 'daydreaming while at work'.
- Open the picked RAW file as a 'Smart Object' in Adobe Photoshop.
- Carry out basic adjustments like enabling profile corrections and any necessary cropping/sharpening/noise reduction in Adobe Camera Raw.
- Make a new 'smart object via copy' under the 'Layer' menu. This would enable me to mask out the black and white for the picture within the picture and then adjust the colour/contrast for the picture within the picture layer independently later.
- Convert the top of the two 'Smart Object' layers into black and white and carefully adjust the colour channels until I achieve a balanced image with regards to the person and the rest of the scene. This was mainly raising the orange levels (skin colour) and sometimes lowering the blue/green levels.
- Create a layer mask on the top (black and white) layer.
- Paint in black on the layer mask over the desired area (the picture in picture), until only that part of the whole image was in colour.
- Repeat this process for all other photographs apart from Photograph 10.
- The workflow for the final photograph (Photograph 10) is present here.
Assignment 5: Daydreaming While at Work - Photograph 10
For my final photograph I decided to photograph myself in a similar manner to the people I had photographed for the assignment so far. However, rather than there being one photograph-within-a-photograph present, I included all of the previous photographs-within-photographs in this one scene. The scene also included my computer - signifying my work and a quite large desk to put everything on.
I thought it made sense to show what I would be daydreaming of while at work in this manner. As well as rounding off the assignment theme quite conveniently, it was also very creative in my opinion. With the photographs-within-photographs being displayed together like this it showed an insight into my life because the people in each photograph were all personally important.
Initially, I pictured an over the shoulder perspective from high above, with the photographs-within-photographs displayed on the desk around me and the computer. However, I soon realised this didn't make practical sense to me because firstly the desk simply wasn't large enough to accommodate all the photographs and secondly I felt the over the shoulder viewpoint was weak in this case as my back would have been facing the camera and any insight into myself through facial expression would have obviously been lost.
Instead I tried a viewpoint where I was in profile to the camera, with the computer in front of me but also profile to the camera and this worked much better for my intentions.
Another feature of the photograph aesthetically was my vision that the rest of the scene should be in deep shadow - appearing black to the camera. My reasoning for this was to make the photograph convey how I quite often worked when editing photographs or writing content about my photographs. Also, I felt the extra 'drama' induced by this feature of the photograph captured the viewer's attention; especially the way the photographs-within-photographs appeared to be hovering in mid-air. Perhaps this showed off the daydreaming aspect of the photograph. I accomplished this 'deep shadow' mostly by using black-coloured material over the desk and lighter parts of the backdrop.
I chose a high viewpoint to make the photograph formal, in that all was there to be seen, where it was a summation of the initial photographs I had been taking in one shot.
The workflow for this final photograph was quite complicated in that I had to make multiple exposures for various parts of it, in order to light parts of the scene appropriately. One essential practical aspect was the use of a tripod - to make the multiple exposures overlay accurately and to make the self-portrait.
Firstly, I imported the different Raw exposures into Adobe Lightroom and enabled profile corrections for the five exposures I would use. Then I opened each as a 'Smart Object' in Adobe Photoshop and duplicate these layers into one file. After that I opened each exposure into Adobe Camera Raw and adjusted exposure for the part of the scene, which that layer would account for. Then I created a black layer mask for all the layers apart from the base layer - for which I had created a 'Smart Object via Copy'. The reason I had duplicated that layer like that was so I could darken that new Smart Object independently making it much darker, in order to introduce the dark shadow areas around the peripheries I was after. I did this by opening the Smart Object in Adobe Camera Raw and simply darkened the exposure and created a black layer mask for this layer as well. Then I started the painting-in of white on the black layer masks so that only the areas I wanted apparent were visible. This included an exposure for the computer screen, one for the foreground photographs-within-photographs, one for those further away, one for my body and lastly, one for the dark shadow areas.
To keep the theme of daydreaming while at work going, where the only part of the photograph in colour were the photographs-within-the-photograph I painted over myself with a completely desaturated adjustment brush in Adobe Lightroom afterwards.
Overall, I felt this photograph worked well, in drawing the viewer's eye to the connection between my face and expression, the computer screen and the photographs-within-the-photograph.
I thought it made sense to show what I would be daydreaming of while at work in this manner. As well as rounding off the assignment theme quite conveniently, it was also very creative in my opinion. With the photographs-within-photographs being displayed together like this it showed an insight into my life because the people in each photograph were all personally important.
Initially, I pictured an over the shoulder perspective from high above, with the photographs-within-photographs displayed on the desk around me and the computer. However, I soon realised this didn't make practical sense to me because firstly the desk simply wasn't large enough to accommodate all the photographs and secondly I felt the over the shoulder viewpoint was weak in this case as my back would have been facing the camera and any insight into myself through facial expression would have obviously been lost.
Instead I tried a viewpoint where I was in profile to the camera, with the computer in front of me but also profile to the camera and this worked much better for my intentions.
Another feature of the photograph aesthetically was my vision that the rest of the scene should be in deep shadow - appearing black to the camera. My reasoning for this was to make the photograph convey how I quite often worked when editing photographs or writing content about my photographs. Also, I felt the extra 'drama' induced by this feature of the photograph captured the viewer's attention; especially the way the photographs-within-photographs appeared to be hovering in mid-air. Perhaps this showed off the daydreaming aspect of the photograph. I accomplished this 'deep shadow' mostly by using black-coloured material over the desk and lighter parts of the backdrop.
I chose a high viewpoint to make the photograph formal, in that all was there to be seen, where it was a summation of the initial photographs I had been taking in one shot.
 |
| Photograph 10 |
Firstly, I imported the different Raw exposures into Adobe Lightroom and enabled profile corrections for the five exposures I would use. Then I opened each as a 'Smart Object' in Adobe Photoshop and duplicate these layers into one file. After that I opened each exposure into Adobe Camera Raw and adjusted exposure for the part of the scene, which that layer would account for. Then I created a black layer mask for all the layers apart from the base layer - for which I had created a 'Smart Object via Copy'. The reason I had duplicated that layer like that was so I could darken that new Smart Object independently making it much darker, in order to introduce the dark shadow areas around the peripheries I was after. I did this by opening the Smart Object in Adobe Camera Raw and simply darkened the exposure and created a black layer mask for this layer as well. Then I started the painting-in of white on the black layer masks so that only the areas I wanted apparent were visible. This included an exposure for the computer screen, one for the foreground photographs-within-photographs, one for those further away, one for my body and lastly, one for the dark shadow areas.
To keep the theme of daydreaming while at work going, where the only part of the photograph in colour were the photographs-within-the-photograph I painted over myself with a completely desaturated adjustment brush in Adobe Lightroom afterwards.
Overall, I felt this photograph worked well, in drawing the viewer's eye to the connection between my face and expression, the computer screen and the photographs-within-the-photograph.
Assignment 5: Daydreaming While at Work - Photograph 9
 |
| Photograph 9a - the photograph within Photograph 9b |
With regards to the final Photograph 9b, as she was studying - similar to my subject in Photograph 8, I chose a library setting to reflect this. This time, in comparison to Photograph 8b, I asked my subject to hold a separate book to show she was studying. Then I asked her to look 'past' the photograph-within-the-photograph (9a), which was placed against one of the book shelves. This was so a connection could be made between Photograph 9a, her wistful, slightly sombre facial expression and the book she was holding. This last feature's connection was made more obvious by the pose I had asked her to stand in: with an elbow leaning on one of the book shelves. I thought this made Photograph 9b as a whole work well and be more 'together' compositionally.
 |
| Photograph 9b |
Saturday, 19 April 2014
Assignment 5: Daydreaming While at Work - Photograph 8
I arranged to meet with my subject at a race track, where he trained a lot in his spare time. I envisaged a flood-lit track in the blue hour just before full-night, with my subject training. I was very pleased with the resultant initial photograph (8a). I thought the orange of the track complemented the blue of the sky nicely and I managed to capture my subject training in full flow. I would have liked to have had him fill a bit more of the frame but he was still crucially recognisable as the person in the eventual final Photograph 8b.
I then arranged again to this time meet at the place where he studied. It was in stark contrast to the outdoor, massive training track in Photograph 8a: the library corner I chose to photograph him in was very confined. Everything in that part of the library (the books and their shelves) converged into the centre, where the photograph-within-the-photograph (8a), caught the eye immediately because of this.
I asked him to hold Photograph 8a so it appeared he was pulling it out of one of the book shelves, almost like he was about to pull out a study book but instead was pulling out what he was daydreaming of.
Lastly, the expression invited the viewer to look towards the book shelves to his right and more specifically to his hands and ultimately: Photograph 8a. Therefore, I felt Photograph 8b was successful compositionally and the expression on his face caught (at least my) attention.
 |
| Photograph 8a - the photograph within Photograph 8b |
 |
| Photograph 8b |
Lastly, the expression invited the viewer to look towards the book shelves to his right and more specifically to his hands and ultimately: Photograph 8a. Therefore, I felt Photograph 8b was successful compositionally and the expression on his face caught (at least my) attention.
Assignment 5: Daydreaming While at Work - Photograph 7
For the photograph-within-a-photograph (7a), I decided and agreed with my subject a typical situation, where she would be not working. This would be relaxing in her garden, reading a newspaper. This was a reflection on her busy lifestyle, where even while relaxing, she would usually be doing something proactive.
I thought I captured this accurately with Photograph 7a, particularly the natural expression on her face and with her feet up.
For the final photograph 7b, I managed to capture what I thought was a telling expression on my subject's face; showing she was daydreaming. This, coupled with her fingers typing (indicating she was working) and the spatial positioning of Photograph 7a, made for an alluring scene in my opinion. The scene itself was quite busy but I rearranged some of the clutter in the foreground. I also placed Photograph 7a deliberately in front of an open file folder, which made for what I felt was a more cohesive composition. I thought I still retained a faithful rendition of her workplace though.
Lastly, the lighting in the room for Photograph 7b was all from a window, in the direction to which she was looking; adding an extra, natural feel.
 |
| Photograph 7a - the photograph within Photograph 7b |
I thought I captured this accurately with Photograph 7a, particularly the natural expression on her face and with her feet up.
For the final photograph 7b, I managed to capture what I thought was a telling expression on my subject's face; showing she was daydreaming. This, coupled with her fingers typing (indicating she was working) and the spatial positioning of Photograph 7a, made for an alluring scene in my opinion. The scene itself was quite busy but I rearranged some of the clutter in the foreground. I also placed Photograph 7a deliberately in front of an open file folder, which made for what I felt was a more cohesive composition. I thought I still retained a faithful rendition of her workplace though.
 |
| Photograph 7b |
Friday, 18 April 2014
Assignment 5: Daydreaming While at Work - Photograph 6
I was already very satisfied with my 'pre-shot' photograph (6a) within the main photograph (6b). In some respects I felt I actually had to make the final image live up to the standards set for Photograph 6a and I thought I managed to mostly produce that standard.
The reason I was so pleased with Photograph 6a was because it captured my subject in his element, with an accurate expression captured on his face too. The colour and compositional components of the photograph were really strong too in my opinion, with him placed amidst all the colour and also between the sugar cane sticks.
I attempted to do a similar thing for the Final Photograph 6b and capture some of the essence of him but in a working environment this time. Like my first subject for this assignment (captured in Photographs 1a and 1b), my subject was retired but of course this subject similarly still had activity going on in his life so I decided him cooking was an occupation of his time now. I felt this was an accurate assertion and also one that offered enough scope for composition and creativity.
I managed to photograph him at a time when the Sun was just catching the cooker and pans and himself, which gave the photograph a lighter yet simultaneously more lively feel. In fact the scene was quite contrasty so I made two exposures (I was using a tripod); one for the cooker, where the image was brightest and another for the shadows and him. Then I combined the two exposures in Photoshop by placing the darker photo over the lighter exposure and then applying a black layer mask on the dark exposure layer. Finally I painted back with white paint the highlights from the darker exposure back into the image.
I felt the image was successful in this lighting aspect and his expression was quite well captured as well. I did have to hurry with regards to the lighting situation however, with the Sun quickly starting to create unwanted shadows as it got lower. Therefore, because I had to hurry, the sharpness in the shadow areas wasn't optimal and I had to in fact crop put parts of the right of the image because of the shadows. Valuably though, the important parts of the image (including the picture within the picture (Photograph 6a)) were sharp and well-exposed.
Regarding the picture within the picture (Photograph 6a) inside Photograph 6b, I thought it was very well placed and helped make the connection to convey what my subject was daydreaming of.
Meanwhile, there was a good sense of activity, with him cooking evident and the expression was accurate to how I recognised him.
Overall, I would say that Final Photograph 6b was of pretty good quality and I wouldn't change much about it.
The reason I was so pleased with Photograph 6a was because it captured my subject in his element, with an accurate expression captured on his face too. The colour and compositional components of the photograph were really strong too in my opinion, with him placed amidst all the colour and also between the sugar cane sticks.
 |
| Photograph 6a - The photograph within Photograph 6b |
I attempted to do a similar thing for the Final Photograph 6b and capture some of the essence of him but in a working environment this time. Like my first subject for this assignment (captured in Photographs 1a and 1b), my subject was retired but of course this subject similarly still had activity going on in his life so I decided him cooking was an occupation of his time now. I felt this was an accurate assertion and also one that offered enough scope for composition and creativity.
I managed to photograph him at a time when the Sun was just catching the cooker and pans and himself, which gave the photograph a lighter yet simultaneously more lively feel. In fact the scene was quite contrasty so I made two exposures (I was using a tripod); one for the cooker, where the image was brightest and another for the shadows and him. Then I combined the two exposures in Photoshop by placing the darker photo over the lighter exposure and then applying a black layer mask on the dark exposure layer. Finally I painted back with white paint the highlights from the darker exposure back into the image.
I felt the image was successful in this lighting aspect and his expression was quite well captured as well. I did have to hurry with regards to the lighting situation however, with the Sun quickly starting to create unwanted shadows as it got lower. Therefore, because I had to hurry, the sharpness in the shadow areas wasn't optimal and I had to in fact crop put parts of the right of the image because of the shadows. Valuably though, the important parts of the image (including the picture within the picture (Photograph 6a)) were sharp and well-exposed.
 |
| Final Photograph 6b |
Regarding the picture within the picture (Photograph 6a) inside Photograph 6b, I thought it was very well placed and helped make the connection to convey what my subject was daydreaming of.
Meanwhile, there was a good sense of activity, with him cooking evident and the expression was accurate to how I recognised him.
Overall, I would say that Final Photograph 6b was of pretty good quality and I wouldn't change much about it.
Assignment 5: Daydreaming While at Work - Photograph 5
I felt Photograph 5a gave the viewer a good insight into my subject's ideal hobby. The gentle lighting made Photograph 5a appear 'daydream-like' as well. The colours were mostly close to pastel quality too; further enhancing this feel of the photograph.
The Final Photograph (5b) was a shot I was very pleased with - for two complementary reasons. Firstly, I thought it was very creative; having the photograph within the photograph wrapped around the barrel in the brewery setting. Secondly, I thought my subject had just the right facial expression for this specific project - it was very wistful and the pose helped too. Together the facial expression and pose led the eye from the barrels she was leaning on to the foreground barrel, where her photograph within a photograph was wrapped around the front.
Another nice feature of the photograph was the inclusion of a separate worker at the brewery in the frame too. Without him the scene would have seemed a bit empty and less like a working environment. I liked the way both their poses complemented each other and the natural triangle created by the roof's perspective converging in on the activity below. This activity actually took the shape of another triangle beneath the roof triangle, which led the eye to the photograph-within-the-photograph. Then there was a little detail, where the stripes on the main subject's clothing coincided with the stripes on the barrel, which worked well in black and white. Therefore I was really pleased with the compositional element of this photograph.
 |
| Photograph 5a - The photograph within Photograph 5b |
 |
| Final Photograph 5b |
Another nice feature of the photograph was the inclusion of a separate worker at the brewery in the frame too. Without him the scene would have seemed a bit empty and less like a working environment. I liked the way both their poses complemented each other and the natural triangle created by the roof's perspective converging in on the activity below. This activity actually took the shape of another triangle beneath the roof triangle, which led the eye to the photograph-within-the-photograph. Then there was a little detail, where the stripes on the main subject's clothing coincided with the stripes on the barrel, which worked well in black and white. Therefore I was really pleased with the compositional element of this photograph.
Assignment 5: Daydreaming While at Work - Photograph 4
I actually re-did this photograph because I wasn't happy with the first, resultant image (Original Photograph 4b). For me it looked too staged and unnatural, which in turn detracted from what I was trying to convey in this photograph for the assignment. Ultimately, I was much happier with the second version.
I photographed my subject doing one of her favourite pastimes: gardening and I thought I captured a realistic portrayal of how she spent some of her free time. This incidentally also contrasted nicely with Photograph 4b, which was situated in a much more confined and oppressive environment.
My subject was looking directly at Photograph 4a in the Final Photograph 4b, rather than at the camera (as in the Original Photograph 4b). This, combined with a more relaxed posture, made for a more captivating yet true photograph for me.
 |
| Photograph 4a - the photograph within photograph 4b |
 |
| Original Photograph 4b |
 |
| Final Photograph 4b |
My subject was looking directly at Photograph 4a in the Final Photograph 4b, rather than at the camera (as in the Original Photograph 4b). This, combined with a more relaxed posture, made for a more captivating yet true photograph for me.
Assignment 5: Daydreaming While at Work - Photograph 3
For the initial 'pre-shot' - Photograph 3a, I captured a moment that candidly depicted my subject playing in a band, which was the natural, semantic progression for the final photograph (3b). This was because it made sense that he practiced in the room shown in Photograph 3b in order to enjoy play in the band as shown in Photograph 3a. I was pleased that I managed to capture the colours and atmosphere of the scene in Photograph 3a, which would appear vibrant also in the final photograph (3b).
 |
| Photograph 3a - The photograph within photograph 3b |
I also felt the only bit of colour in the photograph (the photograph within the photograph - 3a) was well-positioned and the fact it was covering most of the amplifier made it 'fit in' more. Semantically, it also made sense - the guitar and amplifier implied music; something which can prompt daydreaming. Therefore, a visual representation of his daydream was present coming out of the amplifier.
Again, I waited for his smile to recede slightly before taking the shot, thereby showing a more natural facial expression.
 |
| Photograph 3b - the final photograph |
Overall, I felt this was one of the stronger images I produced for this assignment. This was due to the photograph within the photograph being placed so creatively and also the diagonal lines of perspective from the different objects in the room converging in on my subject.
Assignment 5: Daydreaming While at Work - Photograph 2
I repeated similar steps for the photograph (2a) within the 'main' photograph (2b) for this second shot. It was obvious to this subject that her child was what she naturally daydreamed of during work so I took a quite intimate shot of the two of them together.
I then visited her workplace, along with the A3-sized printed photograph (2a). One nice touch was the use of spectacles in the 'main' photograph (2b), creating a business-like contrast, whereas the photograph within the photograph was more intimate and the lack of spectacles signified this. I also asked her to think of her time with her child in order to get a facial expression which reflected that. In terms of composition, I asked her to look upwards while smiling. This meant even though she was looking in the other direction, it seemed she was thinking of her time with her child (the representation of which was placed above her in the other direction - Photograph 2a).
For the foreground, I included several beverages, which my subject said helped her to get through the day because they contained caffeine. I thought this 'filled out' the frame better, where it would have been quite bare otherwise. It also divulged a bit more information about her working day. I liked the way these foreground objects were placed so they led the eye to my subject; who in turn brought the computer and more importantly, in my opinion, Photograph 2a to the viewer's attention.
 |
| Photograph 2a - the photograph within photograph 2b |
 |
| Photograph 2b - the final photograph |
For the foreground, I included several beverages, which my subject said helped her to get through the day because they contained caffeine. I thought this 'filled out' the frame better, where it would have been quite bare otherwise. It also divulged a bit more information about her working day. I liked the way these foreground objects were placed so they led the eye to my subject; who in turn brought the computer and more importantly, in my opinion, Photograph 2a to the viewer's attention.
Assignment 5: Daydreaming While at Work - Photograph 1
For the first photograph I started off by taking the photograph (1a) that would eventually be used within the 'main' photograph (1b). I included the person who would be daydreaming at work within this smaller photograph so that the viewer of the photograph could make the connection between the 'main' photograph and the photograph within the photograph. I would try to keep this consistent with the other photographs for this assignment so that a theme was apparent, where it could be seen that each person featured in their subordinate, daydream photograph.
I took a picture of what the subject and I agreed would be typically what they'd like to be doing at 'work'. In this case, it was actually taking photographs.
Then I printed the photo I'd just taken at a big size (A3) and placed it in a scene which showed how the person was at 'work' (he was a retired photographer). This brought up a separate, potential issue. In some cases the subjects weren't actually at 'work' but were retired or studying. This did blur the line of what 'work' should consist of, which I found interesting but not problematic. The person remained daydreaming but the workplace was instead just their home or a study space.
Then I carefully set up the scene so that the person was in their natural 'working' environment, which in this case was my subject sitting behind a desk with his collection of cameras he had used through various years in his career as a photographer. So, technically he wasn't at work, but rather in an environment he spent much time in nowadays.
When I had the subject posing how I wanted, I asked him to smile gently so that his expression was one of contentment but also slightly wistfully reminiscent - because he was daydreaming of the picture within the picture (that I had placed to his left).
I decided to keep him centrally placed in this shot because of the very interesting foreground, which consisted of the various cameras he owned. I was satisfied that this worked well, with the paintings and furniture in the background creating a nice fall off.
 |
| 1a - the photograph within photograph 1b |
I took a picture of what the subject and I agreed would be typically what they'd like to be doing at 'work'. In this case, it was actually taking photographs.
Then I printed the photo I'd just taken at a big size (A3) and placed it in a scene which showed how the person was at 'work' (he was a retired photographer). This brought up a separate, potential issue. In some cases the subjects weren't actually at 'work' but were retired or studying. This did blur the line of what 'work' should consist of, which I found interesting but not problematic. The person remained daydreaming but the workplace was instead just their home or a study space.
Then I carefully set up the scene so that the person was in their natural 'working' environment, which in this case was my subject sitting behind a desk with his collection of cameras he had used through various years in his career as a photographer. So, technically he wasn't at work, but rather in an environment he spent much time in nowadays.
When I had the subject posing how I wanted, I asked him to smile gently so that his expression was one of contentment but also slightly wistfully reminiscent - because he was daydreaming of the picture within the picture (that I had placed to his left).
 |
| 1b - the final photograph |
Thursday, 17 April 2014
Bibliography for The final image
Antoni, J. (2009), Inhabit, Photographs. The Photographers' Gallery, London.
Bainbridge, S. (ed.) (October 2013), British Journal of Photography, Volume 160, Apptitude Media Limited, 9 Beaumont Gate, Shenley Hill, Radlett, Herts, WD7 7AR, UK.
Bate, D. (2009), Photography: The Key Concepts, Bloomsbury Academic 2012, 50 Bedford Square, London, WC1B, 3DP.
Bielaski, J. (2014), Jonathan Bielaski - Environmental Portraiture [Online] Available at: http://www.jonathanbielaski.com/ (accessed on 8/2/2014).
D'Oliveira, R. (2012), An Introduction to Dark Website Design [Online] Available at: http://www.1stwebdesigner.com/design/introduction-dark-website-design/ (accessed on 8/2/2014).
DeWitt, M. (Winter 2013), Hotshoe, 186, Hotshoe International Ltd, 29-31 Saffron Hill, London, EC1N, 8SW.
Famighetti, M. (ed.) (Winter 2013), aperture, 213, Aperture Foundation, 547 West 27th Street, 4th Floor, New York, N.Y 10001.
Goto, J. (2013), Lovers’ Rock: An Interview with John Goto [Online] Available at: http://theoxfordculturereview.com/2013/12/23/lovers-rock-an-interview-with-john-goto/ (accessed on 2/2/2014).
Goto, J. (2002), 'Dr. Donald Meltzer' 2002 [Online] Available at: http://www.johngoto.org.uk/portraits/Meltzer/pages/Dr%20D%20Meltzer.htm (accessed on: 2/2/2014).
Jones, H. (2010), Whitespace: The Underutilized Design Element [Online] Available at: http://webdesignledger.com/tips/whitespace-the-underutilized-design-element (accessed on 10/1/2014).
Loag, C. (2012), Chris Loag Photography [Online] Available at: http://www.chrisgloag.com/2012/#/HOME (accessed on 10/1/2014).
Newman, A. (n.d.), Newman's Gift - 60 Years of Photography [Online] Available at: http://museum.icp.org/museum/exhibitions/newman/ (accessed on 12/3/2014).
Newman, A. (2006), Arnold Newman Archive [Online] Available at: http://www.arnoldnewmanarchive.com/content/portraits-0 (accessed on 12/1/2014).
Önder, T. (2014), Tuna Önder Street Photography [Online] Available at: http://www.tunaonder.com/ (accessed on 20/1/2014).
Ramos, J. (2014), José Ramos - Nature and Landscape Photography [Online] Available at: http://www.joseramos.com/ (accessed on 10/1/2014).
Roberts, S. (2013), Simon Roberts [Online] Available at: http://simoncroberts.com/?homepage=1 (accessed on 8/2/2014).
Sanschagrin, G. (2011), 10 Secrets to Successful Online Photo Portfolios [Online] Available at: http://blog.photoshelter.com/2011/01/10-secrets-to-successful-online-photo-portfolios/ (accessed on 10/1/2014).
Struth, T. (2010), Thomas Struth - Photographs 1978-2010 [Online] Available at: http://www.thomasstruth32.com/bigsize/index.html (Accessed on 8/2/2014).
Reference Page - The final image
Antoni, J. (2009), Inhabit, Photographs. The Photographers' Gallery, London.
Bate, D. (2009), Photography: The Key Concepts, Bloomsbury Academic 2012, 50 Bedford Square, London, WC1B, 3DP.
Bielaski, J. (2014), Jonathan Bielaski - Environmental Portraiture [Online] Available at: http://www.jonathanbielaski.com/ (accessed on 8/2/2014).
D'Oliveira, R. (2012), An Introduction to Dark Website Design [Online] Available at: http://www.1stwebdesigner.com/design/introduction-dark-website-design/ (accessed on 8/2/2014).
Goto, J. (2013), Lovers’ Rock: An Interview with John Goto [Online] Available at: http://theoxfordculturereview.com/2013/12/23/lovers-rock-an-interview-with-john-goto/ (accessed on 2/2/2014).
Goto, J. (2002), 'Dr. Donald Meltzer' 2002 [Online] Available at: http://www.johngoto.org.uk/portraits/Meltzer/pages/Dr%20D%20Meltzer.htm (accessed on: 2/2/2014).
Guijarro, A. (2010-2013), Momentum [Photograph] In. British Journal of Photography (October 2013), Aptitude Media Limited, 9 Beaumont Gate, Shenley Hill, Radlett, Herts, WD7 7AR UK, Pages 44-55.
Jones, H. (2010), Whitespace: The Underutilized Design Element [Online] Available at: http://webdesignledger.com/tips/whitespace-the-underutilized-design-element (accessed on 10/1/2014).
Loag, C. (2012), Chris Loag Photography [Online] Available at: http://www.chrisgloag.com/2012/#/HOME (accessed on 10/1/2014).
Newman, A. (n.d.), Newman's Gift - 60 Years of Photography [Online] Available at: http://museum.icp.org/museum/exhibitions/newman/ (accessed on 12/3/2014).
Newman, A. (2006), Arnold Newman Archive [Online] Available at: http://www.arnoldnewmanarchive.com/content/portraits-0 (accessed on 12/1/2014).
Önder, T. (2014), Tuna Önder Street Photography [Online] Available at: http://www.tunaonder.com/ (accessed on 20/1/2014).
Sanschagrin, G. (2011), 10 Secrets to Successful Online Photo Portfolios [Online] Available at: http://blog.photoshelter.com/2011/01/10-secrets-to-successful-online-photo-portfolios/ (accessed on 10/1/2014).
Bate, D. (2009), Photography: The Key Concepts, Bloomsbury Academic 2012, 50 Bedford Square, London, WC1B, 3DP.
Bielaski, J. (2014), Jonathan Bielaski - Environmental Portraiture [Online] Available at: http://www.jonathanbielaski.com/ (accessed on 8/2/2014).
D'Oliveira, R. (2012), An Introduction to Dark Website Design [Online] Available at: http://www.1stwebdesigner.com/design/introduction-dark-website-design/ (accessed on 8/2/2014).
Goto, J. (2013), Lovers’ Rock: An Interview with John Goto [Online] Available at: http://theoxfordculturereview.com/2013/12/23/lovers-rock-an-interview-with-john-goto/ (accessed on 2/2/2014).
Goto, J. (2002), 'Dr. Donald Meltzer' 2002 [Online] Available at: http://www.johngoto.org.uk/portraits/Meltzer/pages/Dr%20D%20Meltzer.htm (accessed on: 2/2/2014).
Guijarro, A. (2010-2013), Momentum [Photograph] In. British Journal of Photography (October 2013), Aptitude Media Limited, 9 Beaumont Gate, Shenley Hill, Radlett, Herts, WD7 7AR UK, Pages 44-55.
Jones, H. (2010), Whitespace: The Underutilized Design Element [Online] Available at: http://webdesignledger.com/tips/whitespace-the-underutilized-design-element (accessed on 10/1/2014).
Loag, C. (2012), Chris Loag Photography [Online] Available at: http://www.chrisgloag.com/2012/#/HOME (accessed on 10/1/2014).
Newman, A. (n.d.), Newman's Gift - 60 Years of Photography [Online] Available at: http://museum.icp.org/museum/exhibitions/newman/ (accessed on 12/3/2014).
Newman, A. (2006), Arnold Newman Archive [Online] Available at: http://www.arnoldnewmanarchive.com/content/portraits-0 (accessed on 12/1/2014).
Önder, T. (2014), Tuna Önder Street Photography [Online] Available at: http://www.tunaonder.com/ (accessed on 20/1/2014).
Ramos, J. (2014), José Ramos - Nature and Landscape Photography [Online] Available at: http://www.joseramos.com/ (accessed on 10/1/2014).
Roberts, S. (2013), Simon Roberts [Online] Available at: http://simoncroberts.com/?homepage=1 (accessed on 8/2/2014).
Sanschagrin, G. (2011), 10 Secrets to Successful Online Photo Portfolios [Online] Available at: http://blog.photoshelter.com/2011/01/10-secrets-to-successful-online-photo-portfolios/ (accessed on 10/1/2014).
Struth, T. (2010), Thomas Struth - Photographs 1978-2010 [Online] Available at: http://www.thomasstruth32.com/bigsize/index.html (Accessed on 8/2/2014).
Trevor, P. (1975), William Henry Street, Everton, Liverpool, 1975, [Photograph] In aperture (Winter 2013), Aperture Foundation, 547 West 27th Street, 4th Floor, New York, N.Y.10001, Page 62.
Wednesday, 16 April 2014
My Proposed Personal Project - Assignment 5, Digital Photographic Practice - Daydreaming While at Work
I have managed to arrive at a concept for the final assignment for Digital Photographic Practice that is both feasible technically and poses what I thought was a pertinent question about society nowadays, specifically:
What do people (in this case people personal to me) do in their own workplace when they're not working, which they would find desirable to do outside of the workplace? In other words, what do these people daydream of when they should be working?
The reason I thought this question was pertinent was because I was aware that people's minds wander when they shouldn't and particularly nowadays, when there is so much to do outside of the workplace, this would be particularly relevant. In my experience at least, there is usually something most people would prefer to be doing and I intended to capture a person in their working environment, daydreaming of their ideal way of spending time.
I aimed to accomplish this by including 'graphic marks on a flat piece of paper' - Bate (2009), which would be a photograph, within the 'main' frame. This flat picture within a picture would aim to serve the purpose to 'signify a 'reality'' - Bate (2009); namely to show what the person in the 'main' photograph was daydreaming of at the time.
In order to make the picture-within-the-picture 'fit in' better, I would endeavour to use pre-existing flat surfaces and use these to place the picture-within-the-picture over or amidst, where possible . Also I would probably convert the images to black and white to keep a sense of realism, if I felt it made the picture within the picture 'belong' with the rest of the scene.
Influences for Assignment 5 and More of My Most Coherent Thoughts Leading up to Assignment 5: Personal Project
Now that I had conceived a much more concrete idea for the fifth assignment, I realised that at least subconsciously, there were a few influences that I had discovered, which may well have helped provoke such ideas that led to this one, strong idea I described in the previous post: (A Selection of My Most Salient Thoughts Leading Up to Assignment 5: Personal Project for DPP).
One of my main influences was Arnold Newman. This wasn't surprising to me since I had looked very closely at a lot of his wide-angle environmental portraits and the aspect that resonated with me most in much of his work was the sense of depth and extra information captured around the subjects, compared to usual portraiture. He achieved this while still effectively portraying the sitter's expression.
Another, less obvious detail I garnered from Arnold Newman was actually a quote. He said in a quote I found that: '[Photography] is an illusion of reality with which we create our own private world'. I discovered the quote when researching his work and the website I found it on was: http://museum.icp.org/museum/exhibitions/newman/ (accessed 12/3/2014). I found this interesting in that it backed up my conclusions I had been drawing, where photography is simply a representation of life, which the photographer has a degree of control over. I also found this quote helpful because my fifth assignment asked me to produce a project that was personal and I decided it would make sense to photograph people close to me in order for me to create my 'own private world' - Arnold Newman.
Two more photographers' work that influenced me were: Alejandro Guijarro's 'Momentum' (2010-2013) project and Janine Antoni's 'Inhabit' (2009) project. They both for me challenged the frame but in almost opposite manner. Guijarro actually filled the frame fully each time, with a blackboard containing equations to do with quantum physics. This made the viewer challenge what they were seeing: was it a photograph or 'real life' and how should they interpret this concept?
Antoni, in contrast had a seemingly more conventional photograph, with a mother in the middle of the frame and lots going on around her. Relevantly though, amidst this busy frame was a picture within a picture. Inside this picture within a picture was another scene altogether. The main photograph was printed so large in the exhibition that the picture within the picture could have been a standalone photograph itself, if viewed up close. This made the viewer question the contents of the photograph: how did the picture in the picture relate back to the main photograph?
Another photograph I stumbled across in a photography magazine (Aperture - Winter 2013) was by Paul Trevor, called 'William Henry Street, Everton, Liverpool, 1975' and this again challenged the frame but also was very impactful because of the relationship between the frame and setting of the photograph, the literal frame the boy was holding and the boy himself; particularly his expression. I knew I liked this use of the frame but had been unsure how to incorporate into my own work in a different way.
Lastly, I was reading about John Goto and found an interesting passage at: http://theoxfordculturereview.com/2013/12/23/lovers-rock-an-interview-with-john-goto/ (accessed 2/2/2014). The actual photograph can be found at http://www.johngoto.org.uk/portraits/Meltzer/pages/Dr%20D%20Meltzer.htm (accessed 2/22014). Here he digitally substitutes the window and also the painting on the wall with different things and it is carried out so well that the viewer (or at least me) wouldn't have known otherwise. I did consider digitally placing the picture within the picture inside my main photograph but decided to manually place it in the scene at the time of taking each photograph. This was because I realised it could be placed almost anywhere in the scene realistically and look authentic.
All of these influences undoubtedly for me changed how I approached the set of final photographs in terms of preparation and also how I conceived the main idea in the first place.
A Selection of My Most Salient Thoughts Leading Up to Assignment 5: Personal Project for DPP
I have gathered here my thoughts in preparation for my last assignment for Digital Photographic Practice. I have deliberated a long time over which theme I would start with as the concept behind my personal project. I have been juggling two most notable ideas; trying to decide which project was best to undertake. This reasoning consisted of feasibility and potential for creativity.
The first idea revolved around the capturing of the vibrancy of the river Thames from evening to night. My methodology behind this would be to portray a sense of journey down or up the Thames during these 'twilight hours'. I would move further and further down or up the Thames, from bridge to bridge and as I moved further along the Thames, the time of day would apparently get later and later in unison. I say 'apparently' because I would take the photographs over a period of days, maybe targeting one bridge a day. The photographs would then be displayed sequentially offering a sense of progression through both time and space.
The second idea was more loosely formed and basically consisted of a picture within a picture. This was primarily rooted from a previous Assignment I had undertaken: Assignment 3: Monochrome (the culmination of which could be found here ). Similar to Assignment 3: Monochrome, I would include people within at least the main photograph but I was unsure how these people would relate to the picture within the picture this time around.
I eventually decided the second idea was more desirable for me, mostly because of the creative aspect this project would be more probable to provide. I felt this project would also be a more natural progression in relation to what I had been discovering during Digital Photographic Practice. However, the lack of 'concrete' ideas for essentially a rather basic concept based around a picture in a picture prevailed in my consciousness.
As I began to question deeper the semantics and implications of this 'picture in a picture' idea though, I found certain qualities started to crop up. One of these was depth. By including a secondary picture within the frame (a picture within a picture) it could effectively cancel out the moment of looking at the photograph in a skeptical/reserved way because it adds depth to the image and so, at least for a moment, the photograph takes on a reality.
My breakthrough idea dawned on me unexpectedly by simply reading about the definition of environmental portraiture, while I was quite stuck for inspiration. After some time researching other environmental photographers, most notably Arnold Newman, I found that although technically these type of portraits were to be of the person in their natural environment, more often than not this was in their place of work. I started to imagine some of the appropriate settings Arnold Newman decided to use for the relevant subjects, replaced by similar settings but with people who I knew well personally - at work. For the several shots I picked out from Newman's archive there were large flat surfaces, which were ideal, in my eyes, to be replaced by the picture in the picture. This notion of replacing these flat surfaces, especially since I had just read what an environmental portrait consists of made me think about what the sitter would replace them with, if at work.
The first idea revolved around the capturing of the vibrancy of the river Thames from evening to night. My methodology behind this would be to portray a sense of journey down or up the Thames during these 'twilight hours'. I would move further and further down or up the Thames, from bridge to bridge and as I moved further along the Thames, the time of day would apparently get later and later in unison. I say 'apparently' because I would take the photographs over a period of days, maybe targeting one bridge a day. The photographs would then be displayed sequentially offering a sense of progression through both time and space.
The second idea was more loosely formed and basically consisted of a picture within a picture. This was primarily rooted from a previous Assignment I had undertaken: Assignment 3: Monochrome (the culmination of which could be found here ). Similar to Assignment 3: Monochrome, I would include people within at least the main photograph but I was unsure how these people would relate to the picture within the picture this time around.
I eventually decided the second idea was more desirable for me, mostly because of the creative aspect this project would be more probable to provide. I felt this project would also be a more natural progression in relation to what I had been discovering during Digital Photographic Practice. However, the lack of 'concrete' ideas for essentially a rather basic concept based around a picture in a picture prevailed in my consciousness.
As I began to question deeper the semantics and implications of this 'picture in a picture' idea though, I found certain qualities started to crop up. One of these was depth. By including a secondary picture within the frame (a picture within a picture) it could effectively cancel out the moment of looking at the photograph in a skeptical/reserved way because it adds depth to the image and so, at least for a moment, the photograph takes on a reality.
The content of both pictures however, was a recurring problem because there would have to be a link between the two pictures (including the person in the primary picture) for the whole image to make sense. I could have just produced a set of photographs with the same argument as Assignment 3: Monochrome but I was quite adamant I wanted to do something (at least slightly) different.
It was obvious to me that the principle of an environmental portrait was what I wanted to base my project on but I couldn't justify the picture within the picture being included only to add extra 'depth' to the final photographs.
I had been reading Bate's book: 'Photography: The Key Concepts' and found an interesting passage; typified by a statement in the book: 'the graphic marks on a flat piece of paper come to signify a reality' - Bate (2009). From this I garnered: if a (flat) surface in the scene of a photograph was covered by a portal into another world (a picture within a picture), then the reaction by a typical viewer to the photograph would be interesting as it would challenge their perception of reality as they attempt to justify its inclusion in a ‘normal’ scene.
I had been reading Bate's book: 'Photography: The Key Concepts' and found an interesting passage; typified by a statement in the book: 'the graphic marks on a flat piece of paper come to signify a reality' - Bate (2009). From this I garnered: if a (flat) surface in the scene of a photograph was covered by a portal into another world (a picture within a picture), then the reaction by a typical viewer to the photograph would be interesting as it would challenge their perception of reality as they attempt to justify its inclusion in a ‘normal’ scene.
My breakthrough idea dawned on me unexpectedly by simply reading about the definition of environmental portraiture, while I was quite stuck for inspiration. After some time researching other environmental photographers, most notably Arnold Newman, I found that although technically these type of portraits were to be of the person in their natural environment, more often than not this was in their place of work. I started to imagine some of the appropriate settings Arnold Newman decided to use for the relevant subjects, replaced by similar settings but with people who I knew well personally - at work. For the several shots I picked out from Newman's archive there were large flat surfaces, which were ideal, in my eyes, to be replaced by the picture in the picture. This notion of replacing these flat surfaces, especially since I had just read what an environmental portrait consists of made me think about what the sitter would replace them with, if at work.
The answer to this for me was that often, they might be daydreaming about something they would like to be doing, rather than what they were actually supposed to be doing. This ideal could be depicted by me in the form of a picture within each of these persons' workplaces; as a picture within a picture.
I thought not only was this a very strong theme, which would be visibly evident; tying the final photographs together but a theme that had a strong, sound rhetoric. This rhetoric posed a potentially pertinent question to the eventual viewer - how do people function on a day-to-day basis in their respective workplaces and what would they typically be daydreaming of while they are working (or not working)?
I thought not only was this a very strong theme, which would be visibly evident; tying the final photographs together but a theme that had a strong, sound rhetoric. This rhetoric posed a potentially pertinent question to the eventual viewer - how do people function on a day-to-day basis in their respective workplaces and what would they typically be daydreaming of while they are working (or not working)?
A Web Gallery
I have been designing a website to display my work. I was aware before starting that many photographers are trying to get their work 'out there' as well. Therefore I decided I would try to make my photography web gallery look captivating yet minimal, at least in the way it was presented.
I have been scrutinising other photographers' websites (some famous and others not so well known) and I have tried to take what I considered the 'best' elements from each site and incorporate it into my own design; refining them where possible. It would be worth noting that while I primarily was visiting these websites for ideas concerning presentation, I often ended up coming away with inspiration regarding what kind of content/categories would work best in my own web gallery. For example: http://www.chrisgloag.com/2012/#/HOME (accessed 10/1/2014), incorporated a comprehensive content sidebar and an appropriate set of categories. The content (much of which I hadn't previously considered) would include: ongoing projects (rather than just separate photographs), contact details, links to this blog, an 'About' page and possibly older projects. The categories I intended to include myself would be: portraits, seascapes, night landscapes and nature.
In terms of navigation, I would endeavour to keep it as simple and uncluttered as possible. This was a key principle resonating in the guides to building a photography website, which I had also been reading online. For example, http://blog.photoshelter.com/2011/01/10-secrets-to-successful-online-photo-portfolios/ (accessed 10/1/2014) stated: 'Your photos are supposed to be the star of the show, so don’t clutter it up with useless design elements'. Starting from one of the most fundamental parts of the website, the theme, I decided a light theme would work better for my usage than a dark one. This was because light themes had the quality of minimalism and were also passable for looking at a variety of images/text for longer moments. In contrast, dark backgrounds were in my opinion more impactful for landscape images. For example: http://www.joseramos.com/ (accessed 10/1/2014), was an example of a nature/landscape photographers' website, which I thought worked very well because of the content it displayed). However, I felt since there was a fair number of my images that were not landscapes, a light theme would work better overall.
One tip I found was not to use 'pure' white as the background with 'pure' black text for the content (or visa versa) but rather something in between. This was so that looking at the website didn't strain the prospective viewers' eyes: 'The first basic rule is to never use pure-white/black on the opposite color.' - http://www.1stwebdesigner.com/design/introduction-dark-website-design/ (accessed 8/2/2014).
I also preferred an automated navigation system (but with a slideshow only for the home page) so the viewer was encouraged to enter the rest of the website. Many photographers' websites followed this design trait on their homepage - a couple of examples being: http://www.tunaonder.com/ (accessed 20/1/2014) and http://simoncroberts.com/?homepage=1 (accessed 8/2/2014). However I would probably use a slow-changing slideshow speed just because in my experience the photographs had the habit of changing just when I was beginning to grasp a certain photograph's allure.
So far as displaying the images was concerned, I imagined a simple gallery, featuring large, unchallenged photographs once opened. One reason for this was I felt, generally speaking, detail was a strength of my photographs and so a large displaying format would help to show this off. A layout trait of the website, backing up these large-displayed photographs would be that it featured generous amounts of 'white space' - a website design term that basically consists of how much 'empty' space there is between each element of the layout of the page. I read about this in an online article: http://webdesignledger.com/tips/whitespace-the-underutilized-design-element (accessed 10/1/2014) and was sure it would be a key feature to keep in mind. If I could try to make sure of sufficient white space between important parts, like the header and main photographs, I felt I could have an aesthetically pleasing website layout.
Another website I looked at was an environmental portrait photographer's called Jonathan Bielaski (found at http://www.jonathanbielaski.com/ (accessed 8/2/2014)). While I would like to have more image separation than Jonathan Bielaski's homepage contained, again the white background seemed very professional and a good navigation system had been implemented.
Finally, the last website I made notes about was the photographer Thomas Struth's (found at http://www.thomasstruth32.com/bigsize/index.html (accessed 8/2/2014)). With Thomas Struth's website I was impressed by how clean it looked but wasn’t too keen on the navigation system. On one hand I was inclined to look at each photograph for a longer moment because of the navigation system, where you had to click on the image itself to get back to the set. For my tastes though I would prefer my website to have a filmstrip for the relevant photos of the set beneath or behind the current selected image within the set.
After implementing these points as well as I could I now have a web gallery up and running, with the url of: www.johnathanhallphotography.co.uk
There still exists elements of the web gallery I would like to make more comprehensive or streamlined: for example the 'Portraits' section of the gallery could be bolstered considerably for content and the web gallery could be a bit more polished in terms of loading times for photographs and display quality on other media devices.
However, I was pleased with the navigation within the different genres and I felt there were a few nice touches like the textured backgrounds so the viewer wasn't looking at pure white backgrounds and the sharing options evident could potentially increase the traffic to the web gallery.
Friday, 31 January 2014
Storing My Photographs and Sharpening for Print
Ever since completing the exercises leading up to the first assignment: ‘Workflow’ for Digital Photographic Practice, I have been keeping all my course photographs and also less serious photographs (which I still considered as important) backed-up on a separate external hard drive. I have also been keeping all of the course photographs and work on my computer, so that I have it in two separate locations.
Furthermore, and because memory is relatively cheap these days, I have also (midway through Digital Photographic Practice) bought another external hard drive in order to archive my most important work and store the rest of my photographs in a more orderly manner. By orderly, I was referring to naming the folders conveniently so I could find the required photos if I needed to go back to them. Dating the folders was something I felt would make this process even easier. Having the work on two external hard drives meant there was less chance of both of them (and the computer) being damaged or stolen.
I have (near the start of Digital photographic Practice) purchased a printer, which I have felt has made a startling impact with my work. This was because of the very faithful colour rendition of the prints compared to my old printer - provided I used the correct paper and settings for the printer profile. The colour rendition was very similar in my eyes to the colours on my (calibrated) computer screen and I must admit it was satisfying seeing the prints appear on the paper as I wanted them to. I was also pleased that (so far) my tutor had been quite satisfied with the prints too.
So far as sharpening my images was concerned, I have become quite wary about over-sharpening images on jpeg files in-camera (the RAW files remain unaffected). This was because I had noticed how the over-sharpening of jpegs produced artefacts that looked unnatural (albeit at 100% on a computer screen). I was therefore very curious to discover how different degrees of sharpening affected an actual print compared to an on-screen image.
My inkling for this exercise was that 'over'-sharpening for print would produce results that made the photographs more detailed, without being detrimental in terms of extra grain or artefacts. This inkling was due to my observation that prints seemed quite soft compared to on-screen images, even when choosing a 'low' sharpening setting option inside Lightroom 5 before print, which I had recently started doing.
 |
| Images 1 and 2 (No Sharpening and Minimal Sharpening) |
In short my inkling was not wrong and I was surprised how much sharpening could be applied before artefacts started appearing. With the first print (Image 1), I applied no sharpening and the print, I was not surprised to see, seemed soft; even in areas of detail like my subject's eyes.
With the second print (Image 2), I decided to increase the sharpening by using the 'High' sharpening setting inside the 'Print' module's dialogue, where in the previous print 'no sharpening' had been selected. I was a bit surprised to find that the increase in detail was 'minimal' to my tastes. However, there was some more detail in the eyes when looking closely at the print. Soft skin areas were very similar to the 'no sharpening' version.
For the third print (Image 3), I chose to increase the sharpening further by adjusting the sharpening sliders inside Lightroom's 'Develop' module to quite extreme values: including a '129' value for sharpening amount, which was more than I usually would have applied. I also applied the 'Standard' sharpening setting within the 'Print' module to further increase the sharpening effect. This time, the effect was more substantial, with extra, visible fine detail in the eyes particularly, compared to the previous two prints. Soft skin areas remained very smooth.
 |
| Image 3 (Significant Lightroom Sharpening) |
Lastly for Image 4, I decided to be very aggressive with the amount of sharpening applied, by using a different sharpening technique altogether, namely the 'high pass filter' inside Adobe Photoshop. I used a high setting of 6.6% on the filter, using the 'Overlay' blend mode on a duplicated layer from the original image, so the effect was strong (compared to the Soft Light blend mode). I also chose to apply the 'Standard' sharpening setting within the 'Print' module of Lightroom again, to further enhance detail. The reason I chose to be so aggressive with the sharpening in this final print was to see how much an effect this drastic sharpening would have on the print as the previous prints of the image had induced quite minor changes in terms of detail.
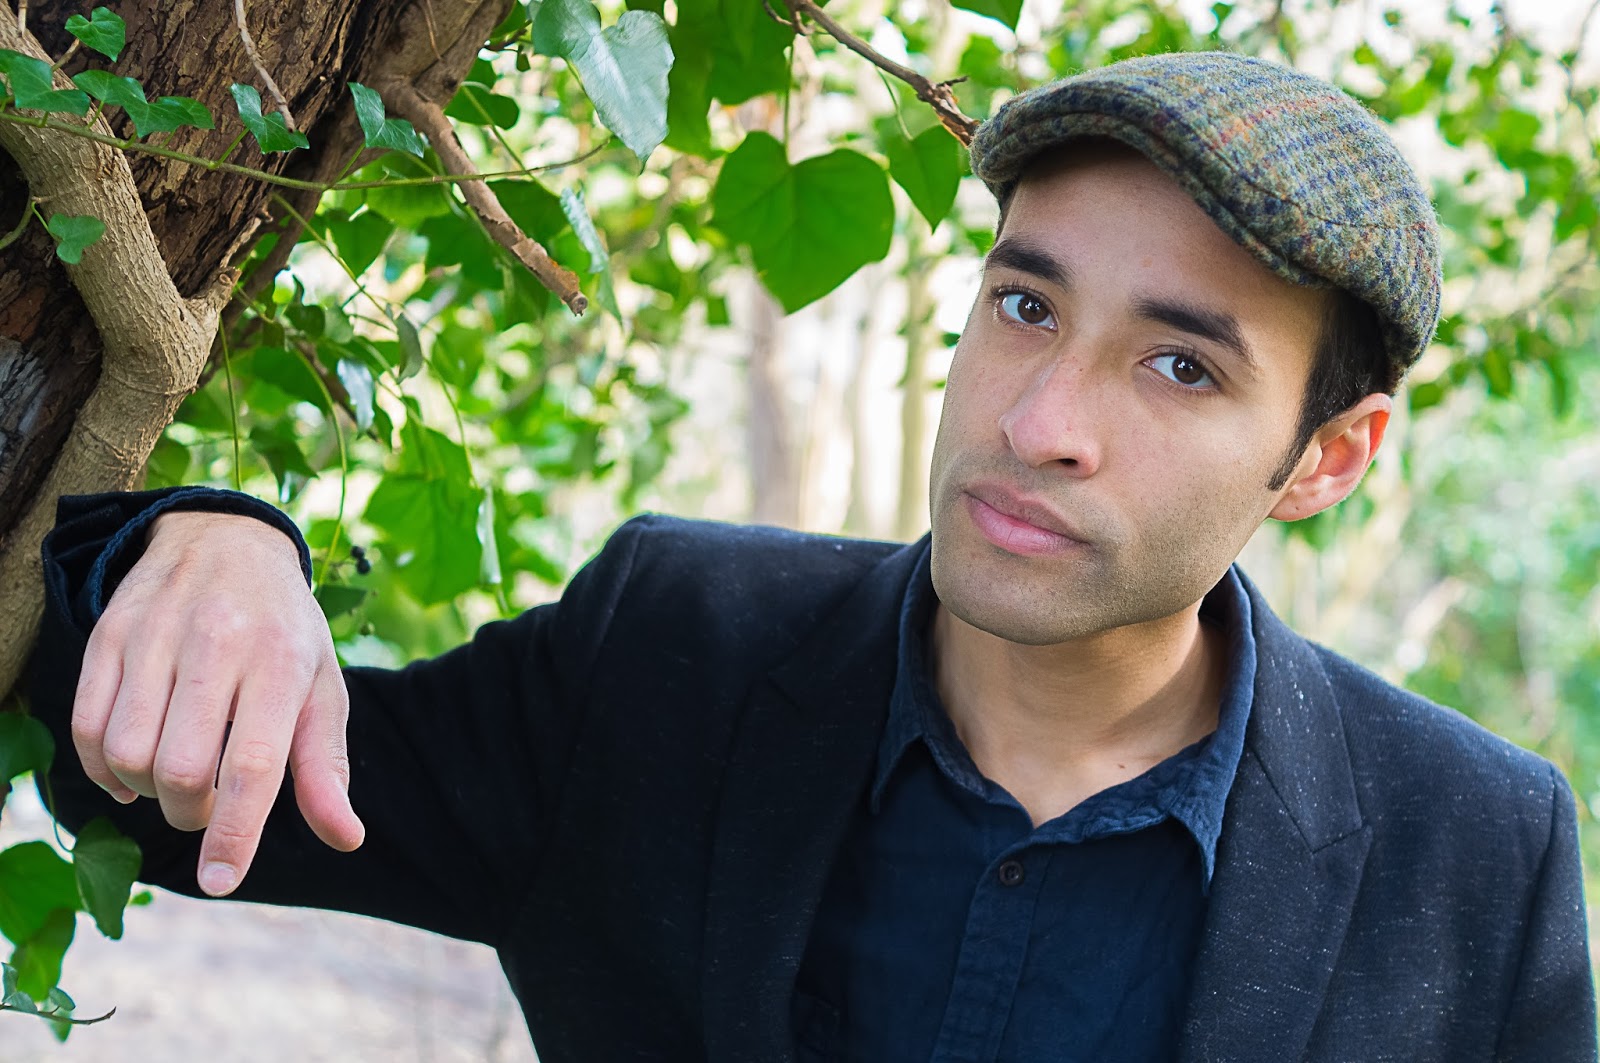 |
| Image 4 (High Pass Filter Sharpening) |
I found that there was a dramatic increase in sharpening, which I had expected. However, there were not many artefacts, which was good to see considering the amount of sharpening. There weren't many artefacts in the on-screen image either though but crucially, the print of Image 4 looked a bit 'cleaner' than the on-screen image, while still retaining visibly more detail compared to the other three prints.
If I had to choose a print to actually use out of the four printed I would probably choose the third image because of the slightly smoother skin seeing as the photograph was a portrait. If it had been a landscape however, I would choose the fourth image's sharpening values (although the degree would be a little less drastic).
In conclusion for this sharpening for print exercise, I've found you can aggressively sharpen and retain more detail but at relative print size in relation to pixel density, without compromising in the form of perceivable artefacts. To add to that, depending on which processing software/printer you use, from my experience, the prints do not come out as sharp as seen on the computer screen. Therefore it is beneficial in my opinion to ‘over sharpen’ if the image is intended to be printed. This also means you have to be wary of not using the ‘print version’ for web use as the onscreen image appears sharper in my eyes compared to the corresponding prints.
Subscribe to:
Posts (Atom)